When you’re getting started in this world, in addition to learning to decipher patterns, different stitches, techniques, etc., one of the first things you should know is how to count the rows in your project if you don’t want to drive yourself crazy. In fact, even after you’ve been knitting a while, you can still get confused and lose yourself. Thinking about this, we’ve decided to help you out and give you some guidelines to use when knitting.
In the following photos, you’re going to see some samples made in:
- Stockinette stitch
- Reverse stockinette stitch
- Seed stitch
- Moss stitch
- Garter stitch
In the photos, we’ve marked the rows with a little explanation to give you an idea on how to count them. You’ll also see the cast on row marked so you can orient yourself.
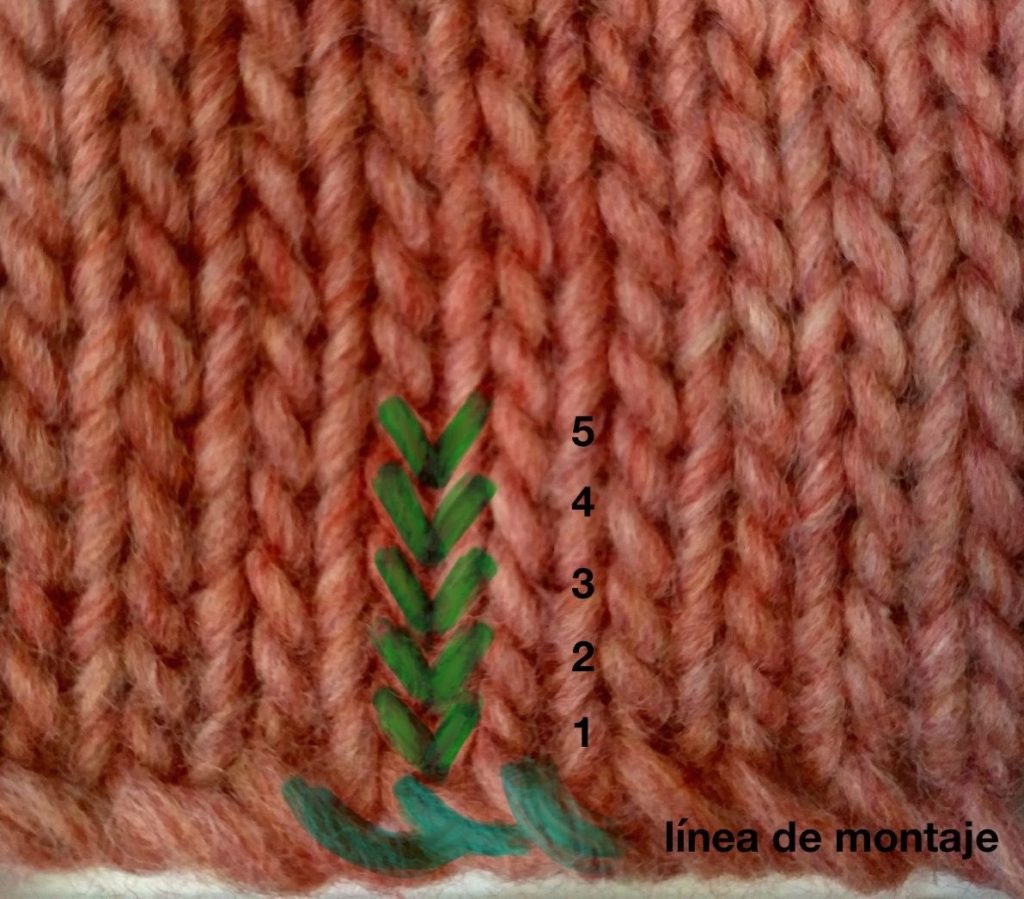
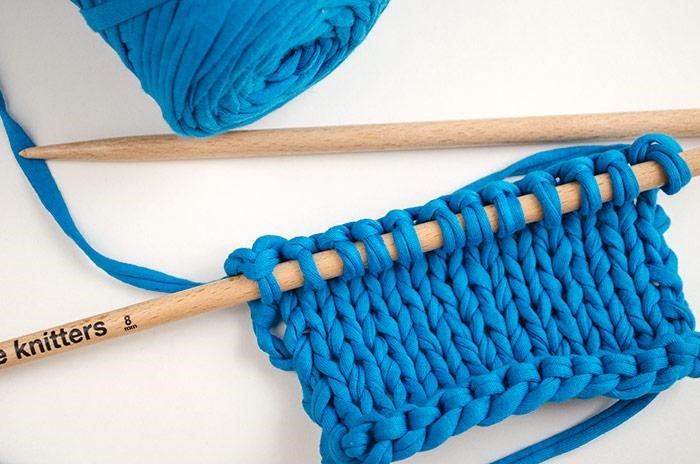
In this photo you can see a sample of stockinette stitch.
Each lap is marked with a green V, since the stitches knitted in stockinette look like this. Next, you can see the corresponding row number.
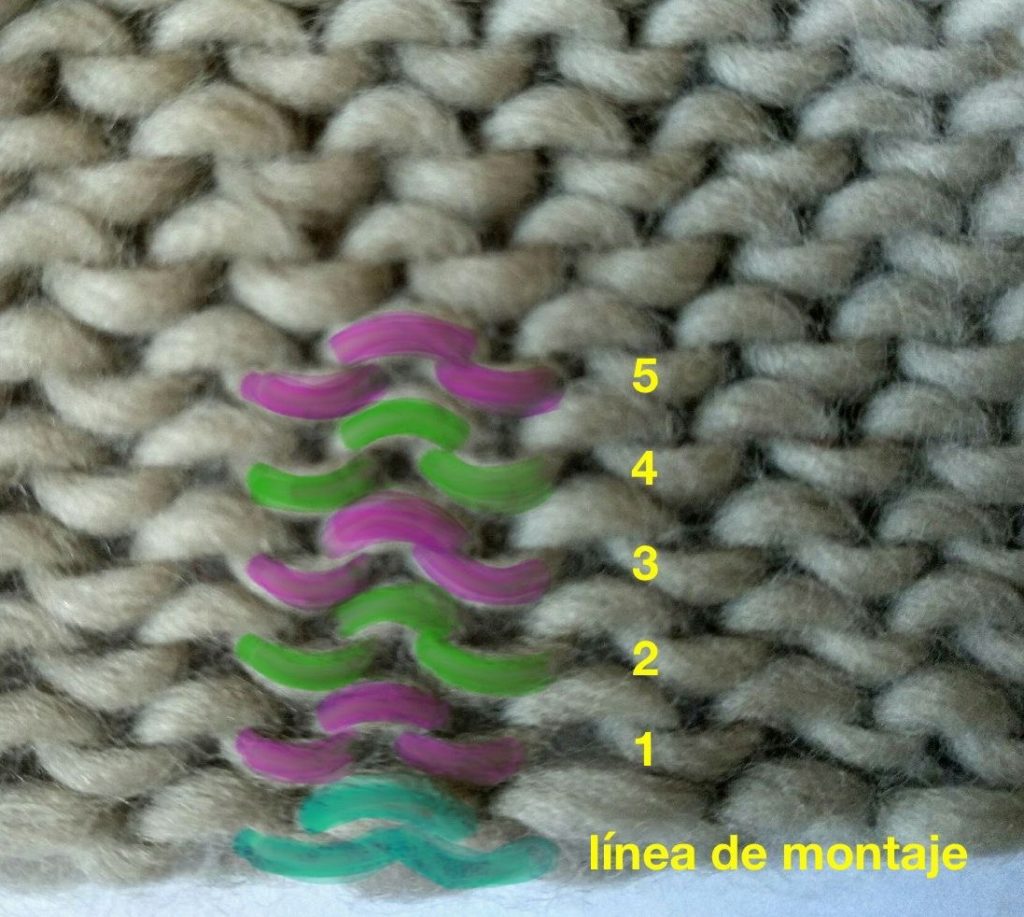
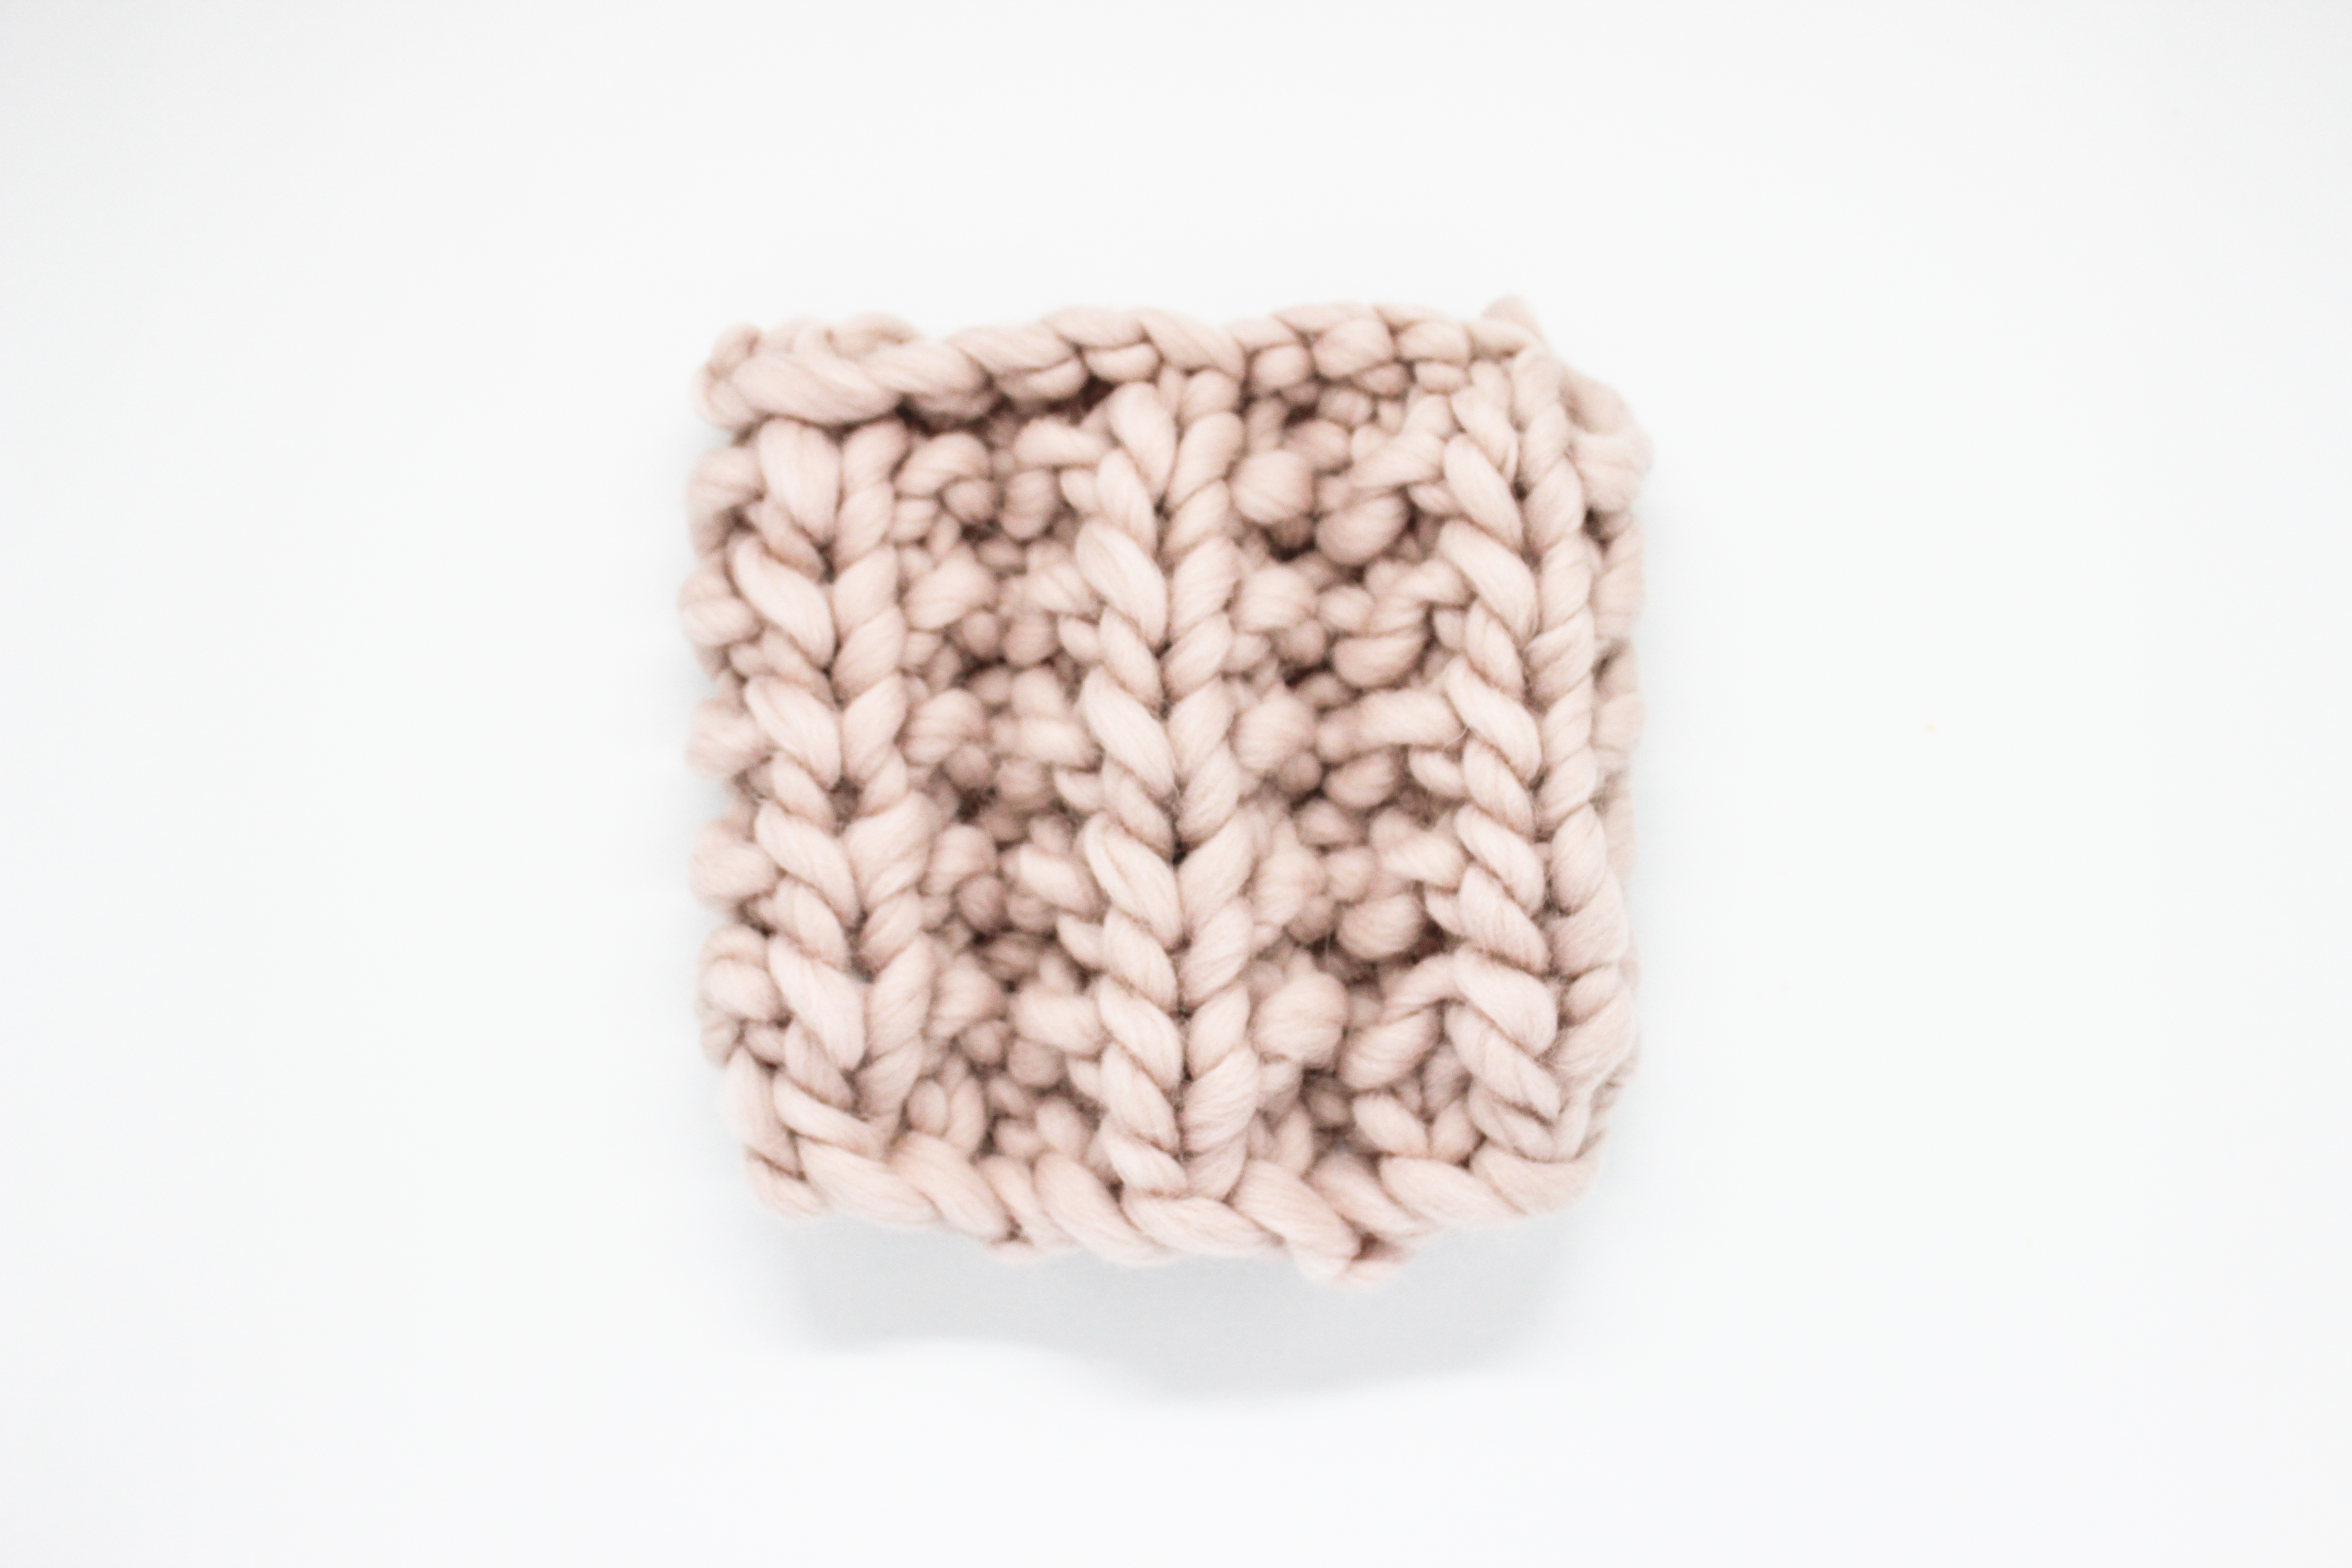
Here you have a sample of reverse stockinette stitch.
In this case we used two colors so that you can see it more clearly, marking the first arc in pink and the next one above it in green, and so on.
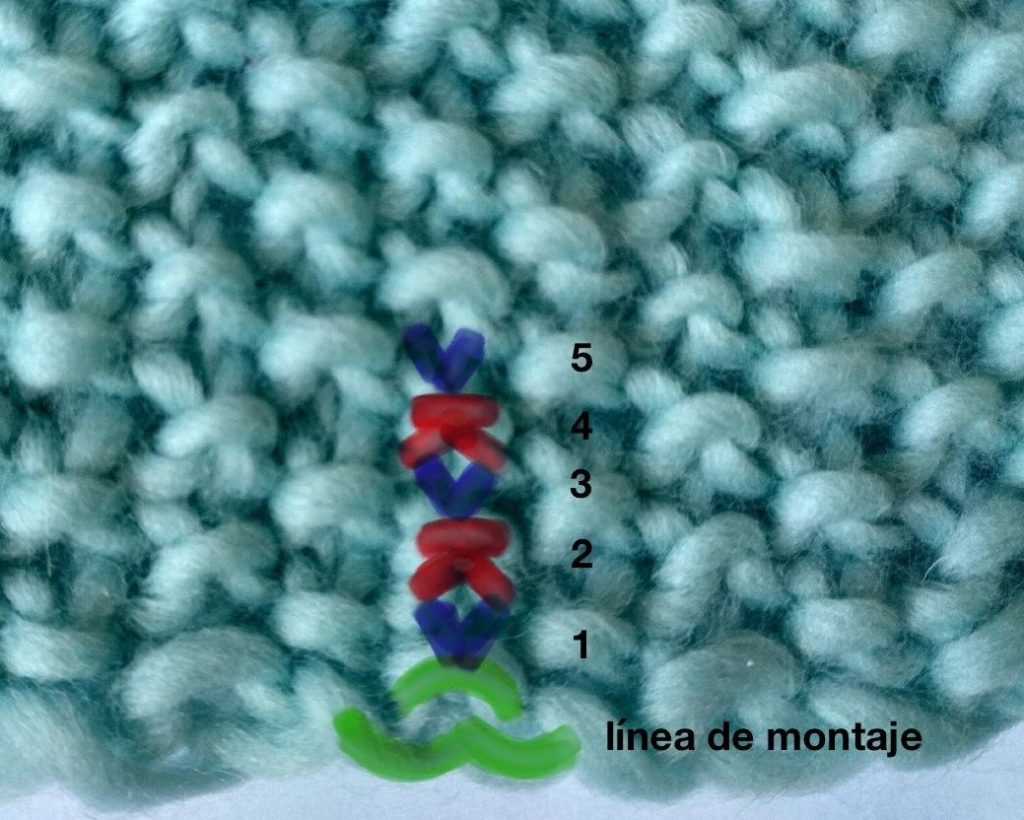
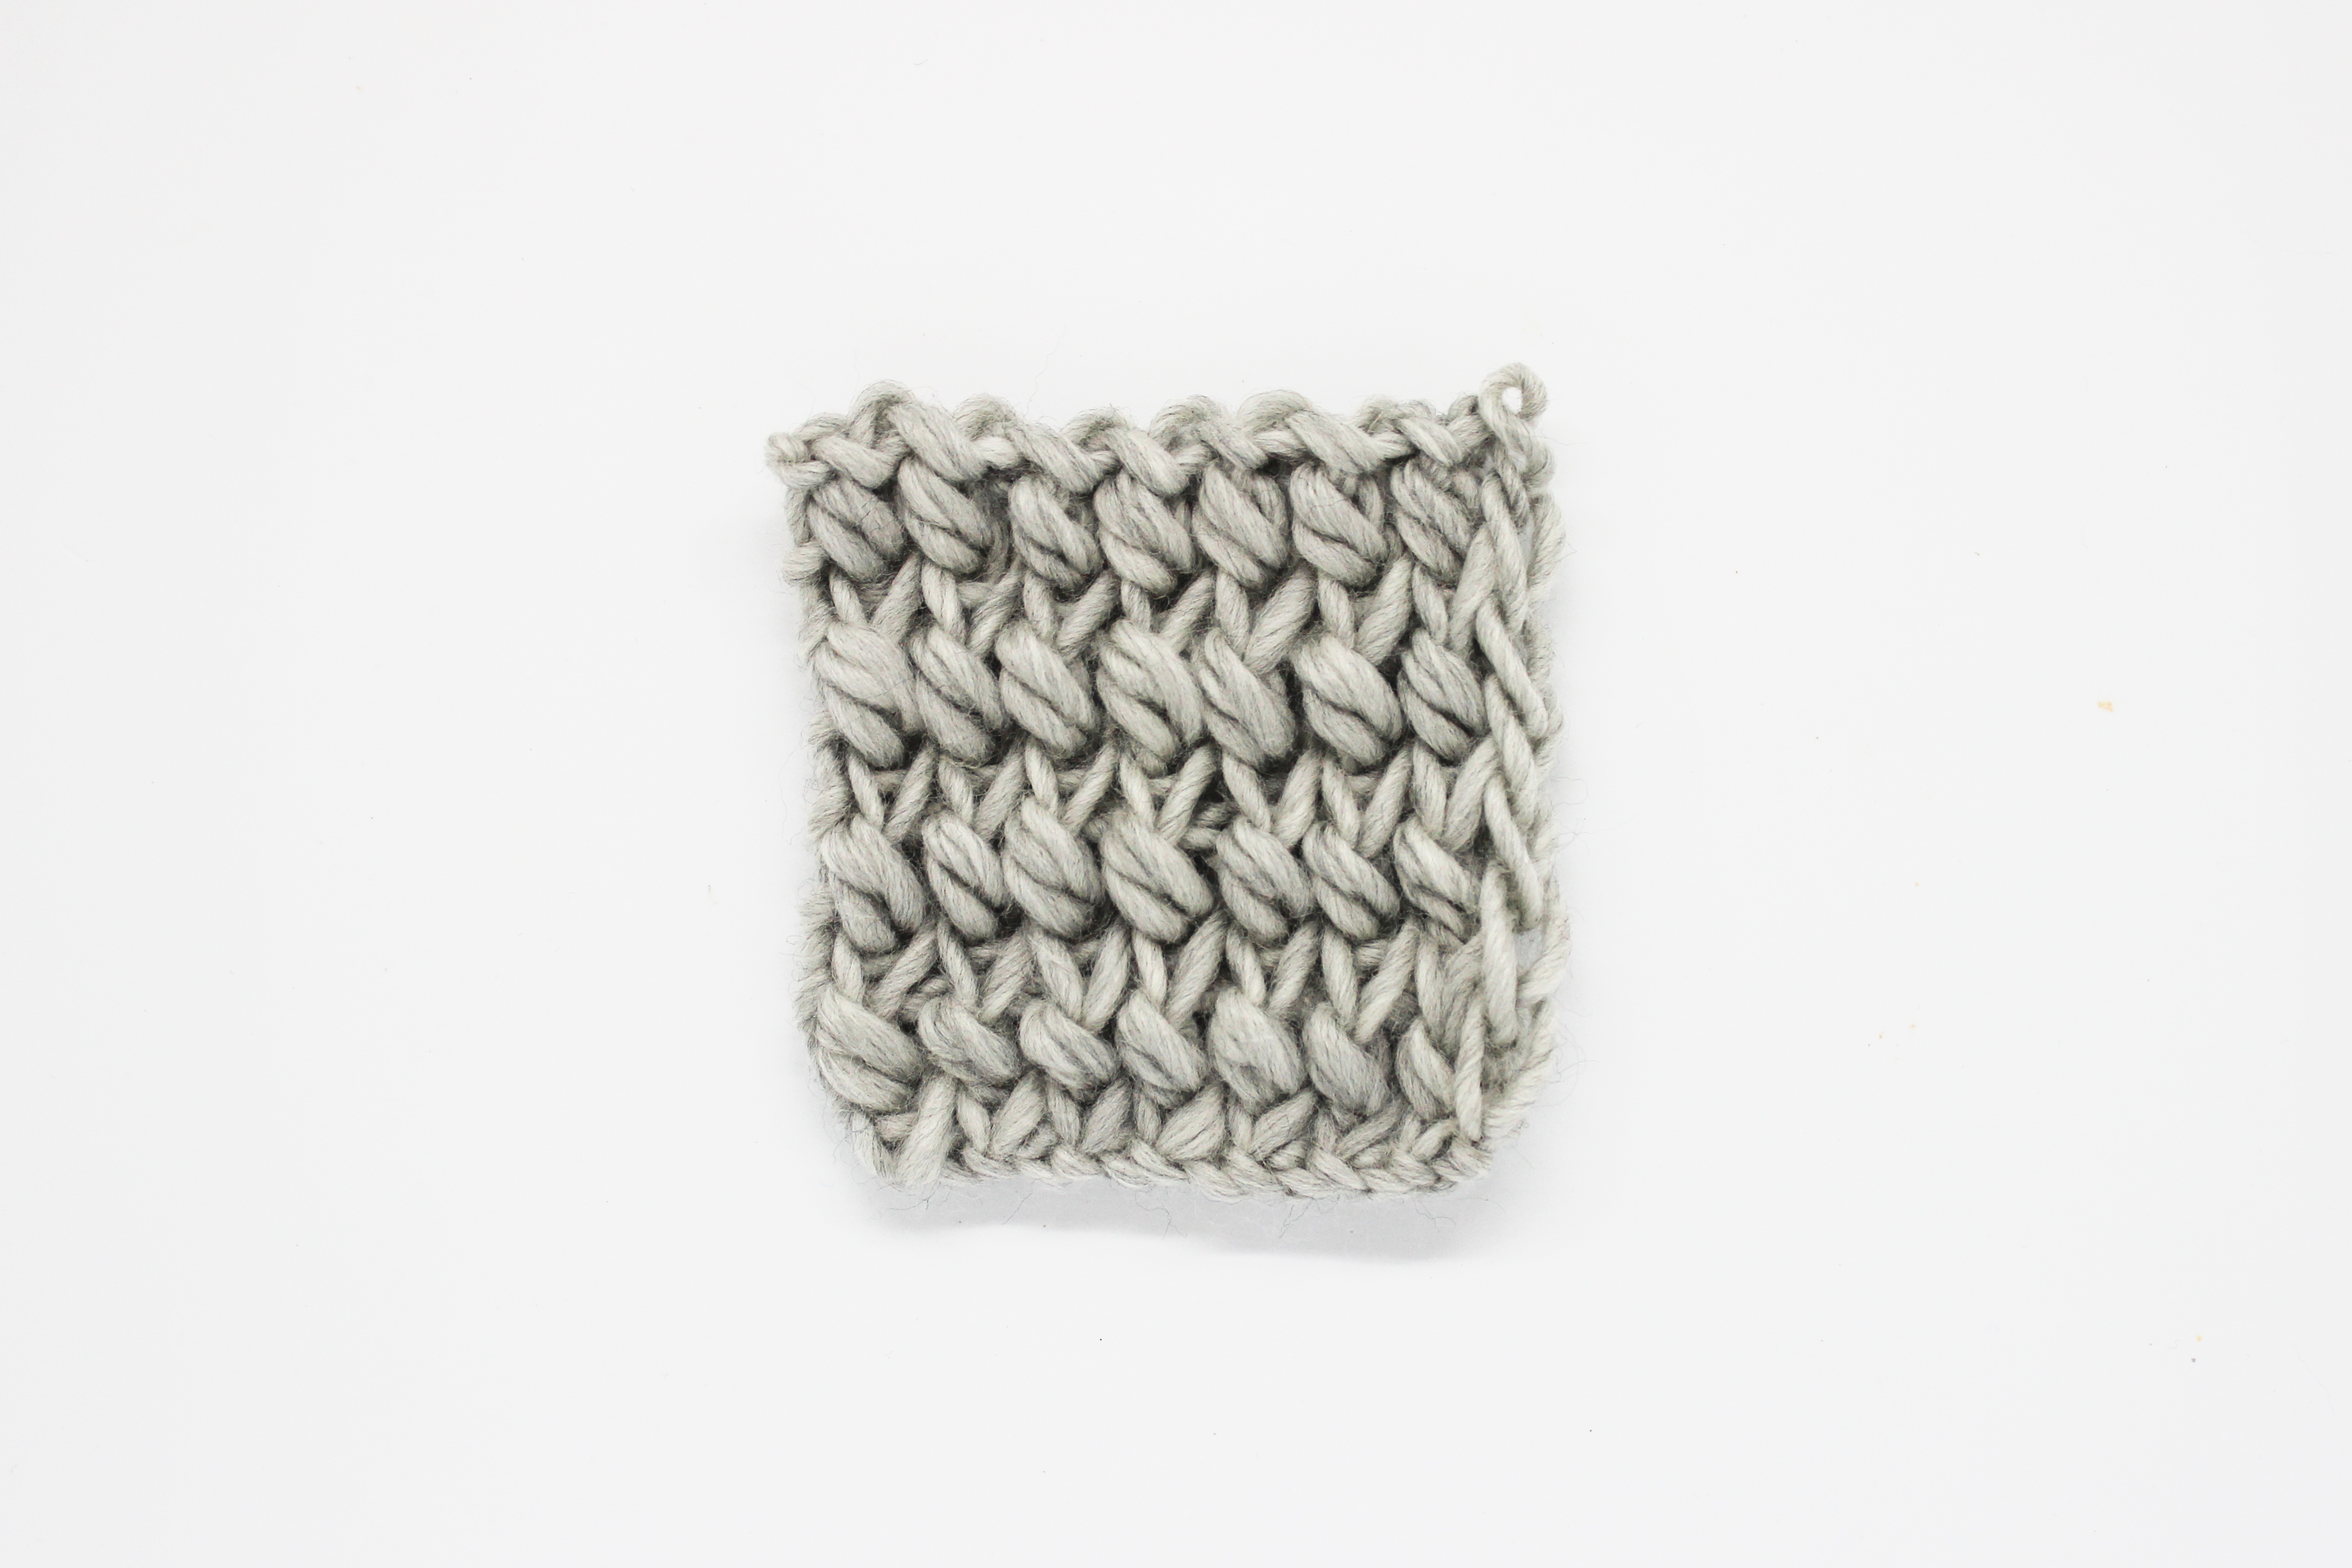
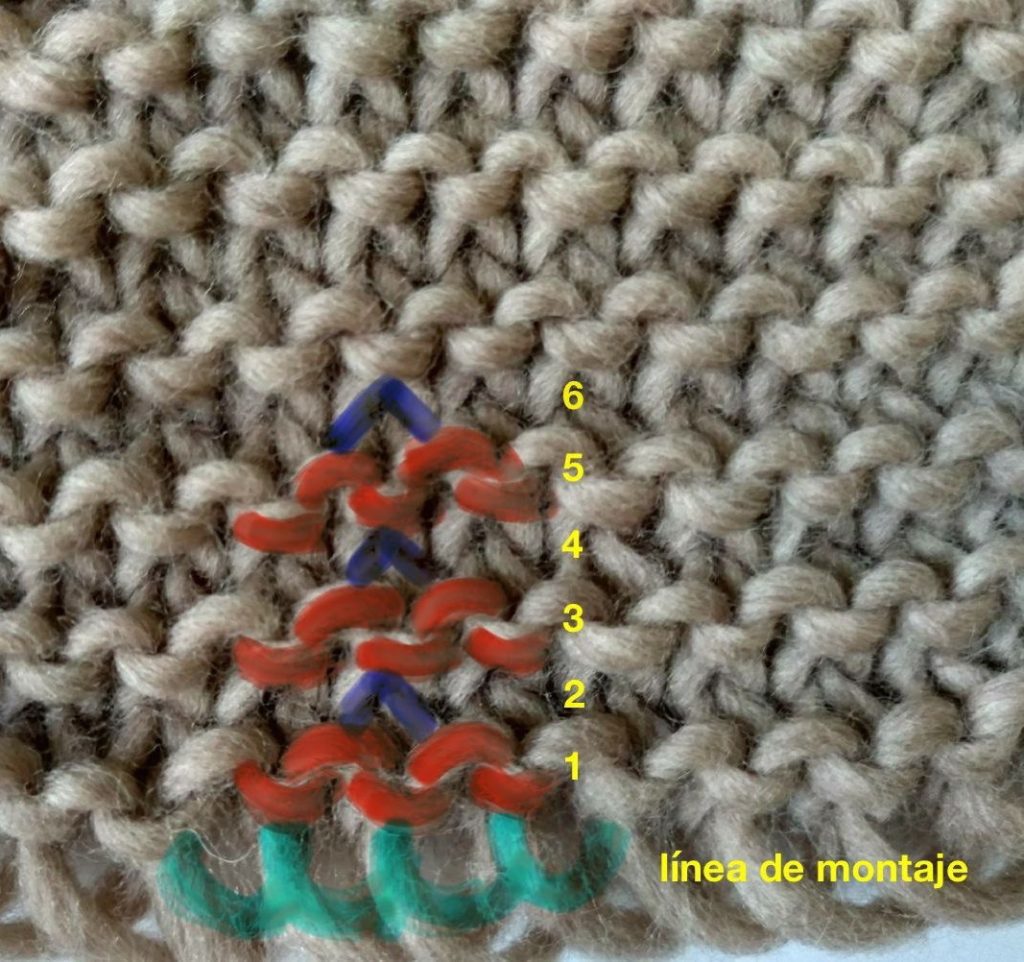
Here, the sample is in seed stitch.
In this photo, you can see that we’ve marked a row in red and the next one in blue. The red mark is the bulging stitch (the purl), and the blue, in the shape of a V, is the stitch that gets pushed behind (the knit), a little more difficult to see in the work.
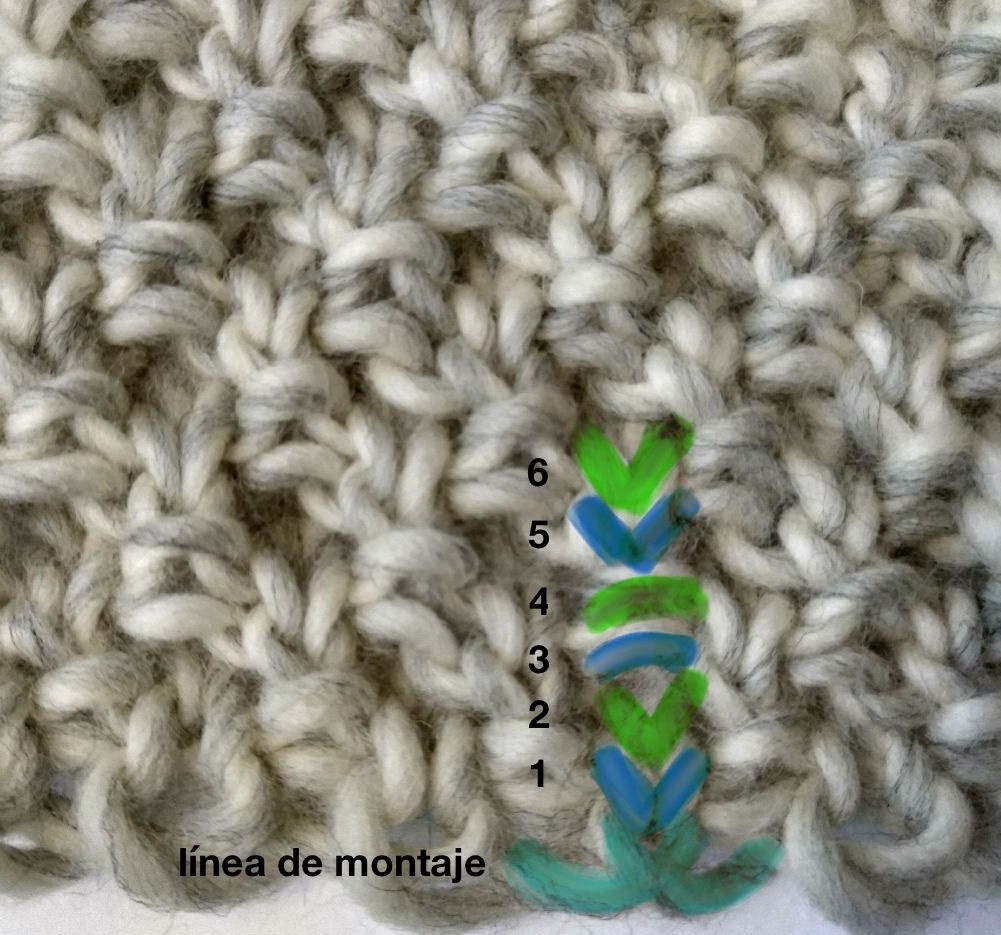
The next sample is in moss stitch.
You can see that the blue V is one row and the green V is the next. Then, we’ve marked the next two rows with a line so that you can distinguish which are the knit rows and which are the purl rows.
Finally, we have a sample in garter stitch. In this example, we marked one row in red (the one that sticks out) and one in blue (the smaller one that gets pushed behind).
As you can see, it’s easier than you thought. It is true that the simpler the design you’re knitting, the easier it is to see it. But don’t worry, you’ll be practicing, and like everything else, you’ll end up mastering it. From here, and as always, you know that we continue to encourage you to practice and share your projects with us at #WeAreKnitters.